Procreate is a popular digital art making tool exclusively available for iPad and iPhone. Sometimes, while working with symmetrical objects in Procreate arts, we may need to use the mirror effect for creating consistent design with high accuracy in all symmetrical places. In this article, we will discuss how you can easily mirror your art in Procreate with the help of tools present in it.
Mirror in Procreate With Transform Tool
This method is used for creating basic mirror effects in existing elements of your art. Whether you are using Procreate for Windows, or on your iPad, to create a mirror in your existing art, you can follow the given steps:
- Open the Procreate app on your iPad.
- Now draw your element or open an existing one in which you want to create a mirror effect.
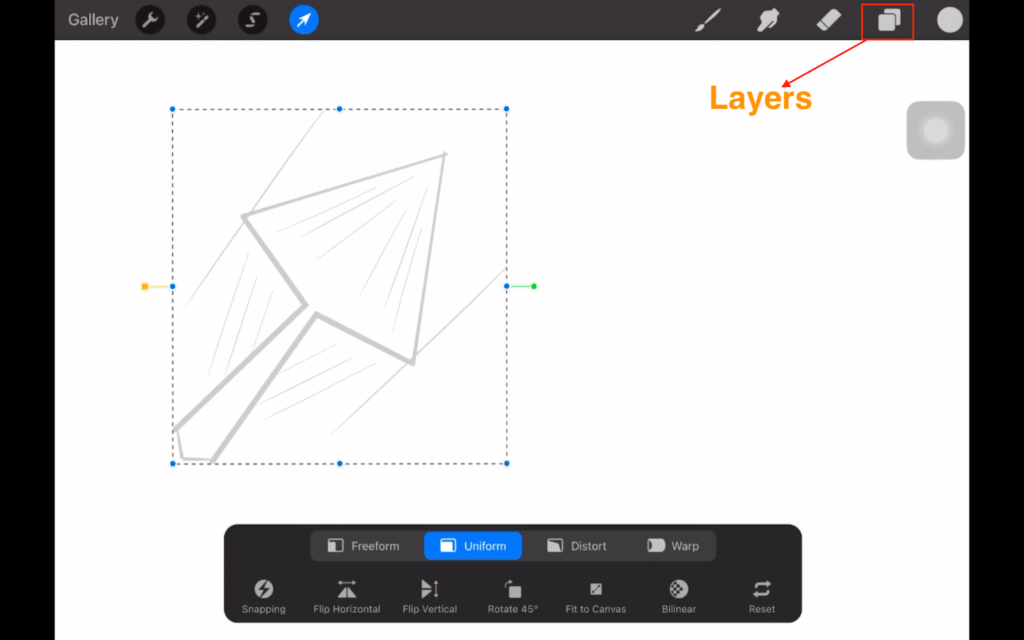
- After that select the “Transform” tool present at the top left corner of the screen, represented by an “Arrow.”
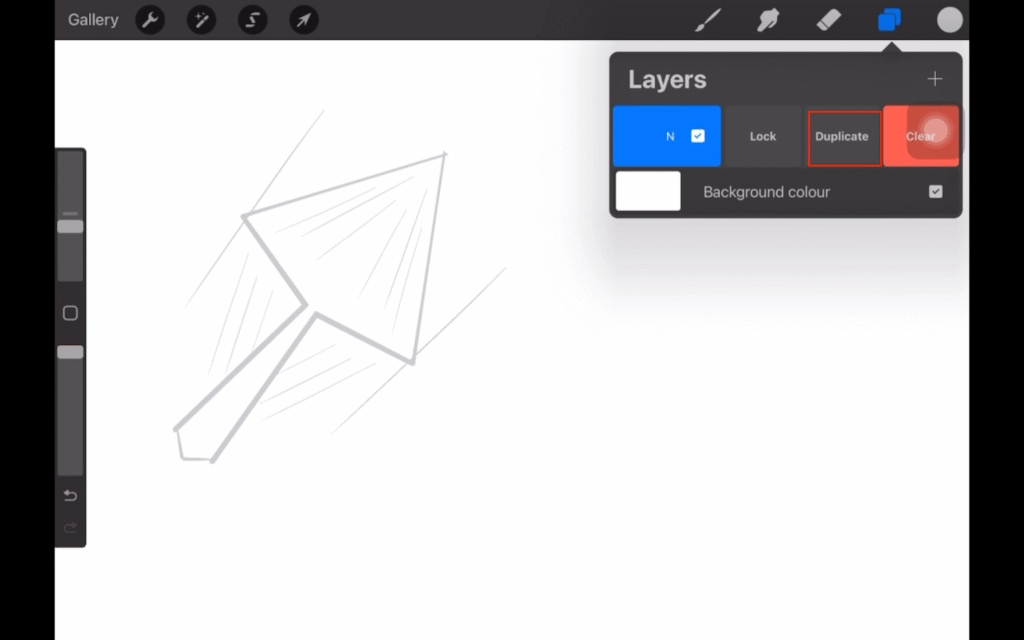
- Click on the “Layers” icon present at the top right corner of your screen.

- Now swipe left on your existing layer of the element and select “Duplicate.”
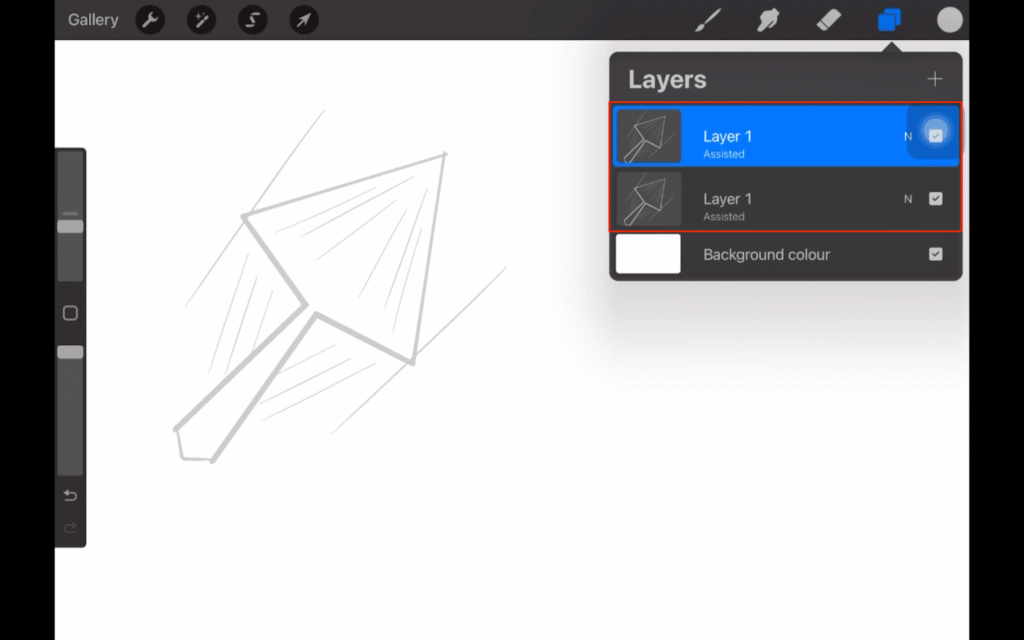
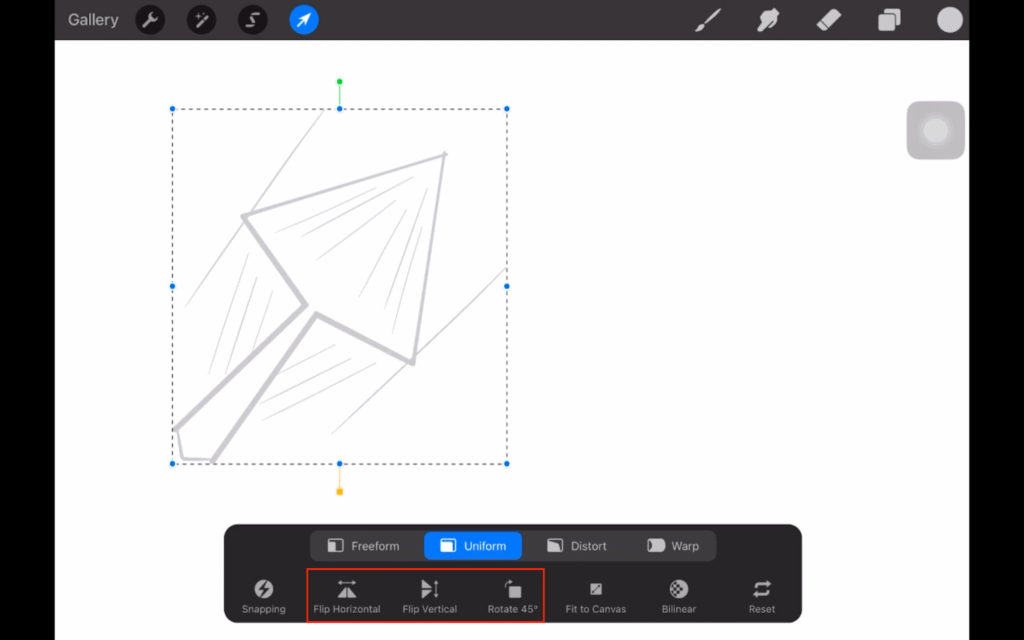
- Now click on the “Transform” button present at the top left corner of the screen.
- Select the “Flip Horizontal” or “Flip Vertical” or “Rotate 45°”option as per your requirement of how you want your mirror effect to appear.
- After that drag your element on screen and adjust it as per your need.

Mirror in Procreate Using Symmetry Tool
The Symmetry Tool in Procreate allows you to create a mirror effect in your art while drawing it in real time.
Using The Symmetry Tool
To use the Symmetry tool, follow the given steps.
- Open your project in Procreate.
- Click on the “Actions” button present at the top left corner of your screen, represented by a “Wrench” icon.

- After that, select the “Canvas” option in the “Actions” sidebar.

- Now turn “Drawing Guide” toggle on in the Canvas section.

- Select the “Edit Drawing Guide” option, present just below the “Drawing Guide” option.

- Now a window will popup on your screen where multiple options will appear, choose the “Symmetry” option in it.

- In the Symmetry section, you will find an “Options” button and by clicking it, you can choose from the four different mirroring styles for your artwork: Vertical, Horizontal, Quadrant, and Radial.
And we also have another extra effect called “Rotational Symmetry.” After selecting your desired style, click on the “Done” button present at the top right corner of your screen and start making your art.

Vertical- In this style, the entire canvas divides into two parts with the help of a middle guideline that runs across the vertically downward direction. Anything drawn in one part will be mirrored on the other part of canvas in real time.

Horizontal- This style works the same as the Vertical Symmetry but instead of a vertical middle guideline, it will be divided by a horizontal middle guideline.

Quadrant- This mode splits Procreate canvas into four equal parts with the help of two lines (one horizontal and one vertical) and anything drawn in one quadrant of the canvas will be mirrored in all other three quadrants.

Radial- In this mode, your canvas divides into eight parts with the help of horizontal, vertical, and diagonal guidelines. And with the help of Radial symmetry, you can make complex arts like mandalas with few strokes.

Rotational Symmetry- This feature can be used with all the Symmetry styles (Vertical, Horizontal, Quadrant, and Radial). When you enable the Rotational Symmetry by toggling it on, it not only mirrors your art but also flips it according to your chosen symmetry style.

Customizing Symmetry Tool Guide
When you choose any Symmetry style, you can see one or more lines that guide you to mirror your art, there are various options available to customize these guidelines as per your need.
Changing Position and Angle of Guide
You can change the position and angle of the guidelines of any Symmetry style with the help of points present on the lines, called Blue Node and Green Node respectively.
To change the position or angle, tap on the particular node and drag it in a particular direction as per your requirement.
After changing the position or angle of these guidelines, you can reset their default position or angle, by clicking on a particular node and selecting “Reset.”


 Here I clicked on the Green Node to Reset the angle |
Color
You can change the color of your guidelines with the help of a slider bar present at the top of your drawing canvas which can be helpful to avoid the camouflaging issues of guidelines with background.

Opacity and Thickness
At the bottom of your screen, options for changing the opacity and thickness of guidelines are present, where, with the help of their respective sliders you can adjust them.

Turning Off Symmetry Tool
To turn off the Symmetry tool, follow the given steps.
- Go to the “Actions” sidebar by clicking on the “Wrench” icon present at the top left corner of your screen.
- In the Actions sidebar select the “Edit Drawing Guide” option.

- Now select the “2D Grid” option in it.

- After selecting the 2D Grid option, turn the “Assisted Drawing” toggle off and click on “Done,” present at the top right corner of the screen.


- Go back to the “Actions” sidebar by clicking on the Wrench icon, then turn the “Drawing Guide” toggle off.
 |  |
- Now the Symmetry tool has been turned off successfully.
In this article we discussed the two methods of creating mirroring effects in Procreate. With the help of the Transform tool you can create a mirror effect in your existing arts whereas the Symmetry tool allows you to create a mirror effect in real time with various customization options which can be useful to create complex symmetrical arts with less stress.
This was my time. You’re welcome. 🙂